If you’ve got kids, you’re probably tired of hearing 6-7, but when it comes to running a bakery, trends can drive traffic and sales. So I couldn’t let Valentine’s Day pass without making a custom cutter that includes 6-7. So in this blog and accompanying video, I’m sharing how I created two different Valentine’s Day cookie cutter designs using the popular 6-7 theme. One uses only free Canva elements, and the other uses a combination of free and paid features. Both designs were then uploaded into Cookie Design Lab to become STL files ready for 3D printing at home. Check out the accompanying YouTube video as well to watch along, and click to download the STL files for version 1 and version 2 files.
Creating the Designs in Canva
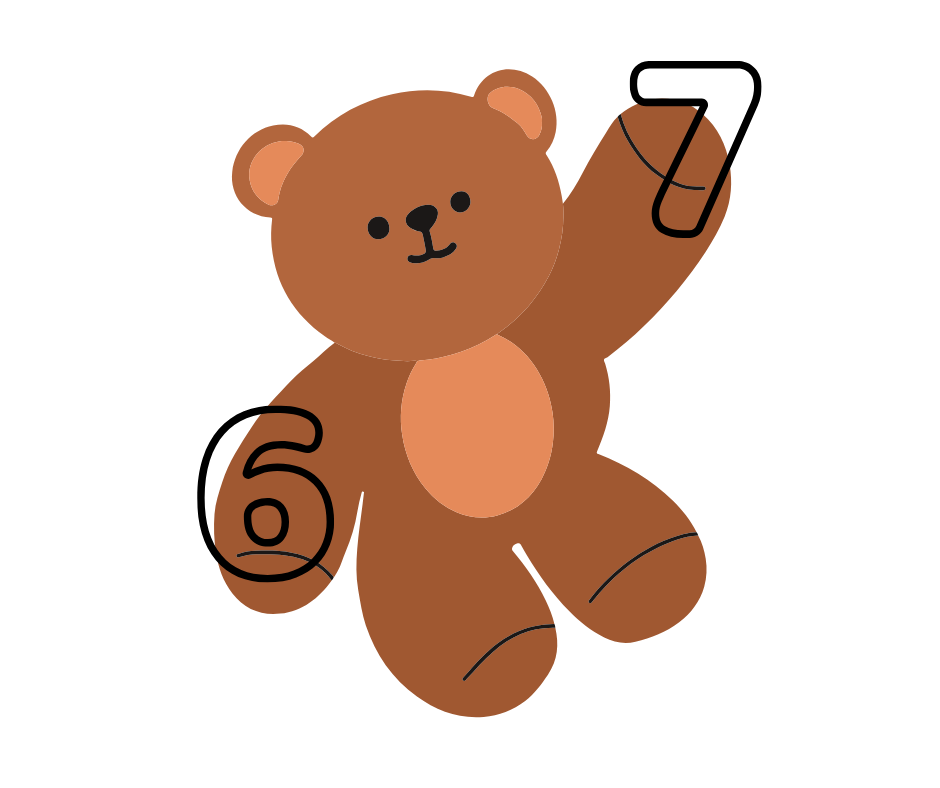
I began in Canva by creating two separate designs on two different pages. For the first version, I selected a free teddy bear graphic and free number elements for the 6 and 7. From there, it was all about playing with sizing and placement of the numbers. I adjusted how the numbers overlapped the bear’s paws and thought through where I’d want natural “bump-outs” in the cutter shape to help guide me later when I’m decorating the cookie.
This part doesn’t need to be perfect. Cookie Design Lab will smooth edges and clean things up later, so Canva is really just about getting the idea in place.
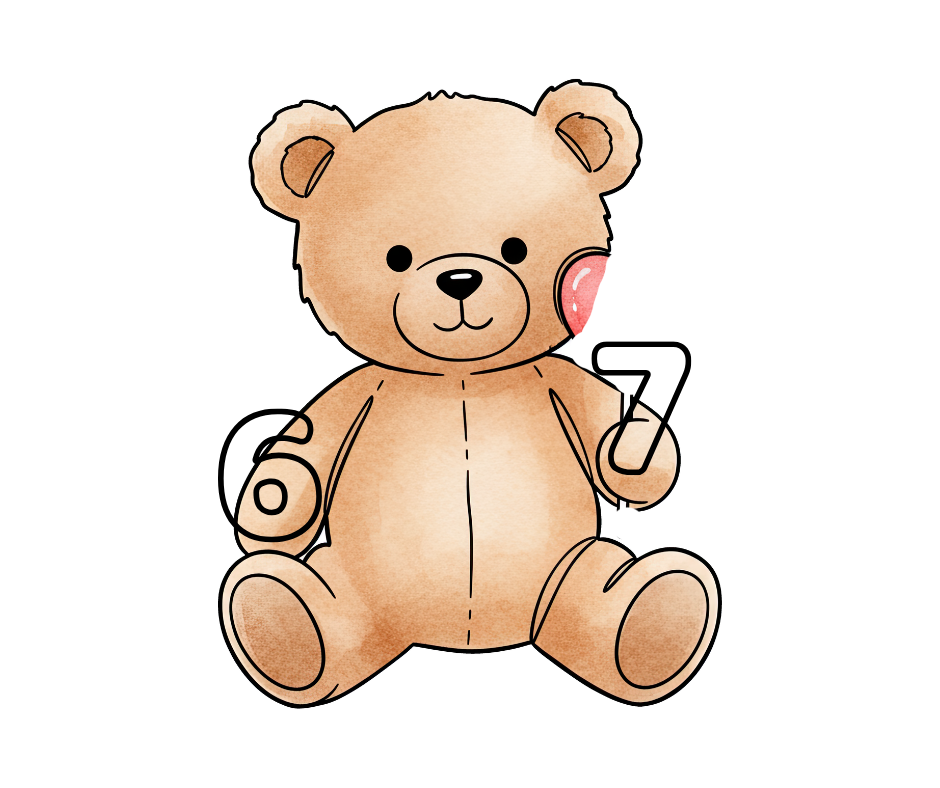
For the second version, I used a premium teddy bear graphic (Canva Pro) and the same free number elements for consistency. This bear was holding a lollipop, and since I wanted the “7” to sit in that space, I used Canva’s Pixel Eraser tool (which is free!) to remove part of the lollipop. I didn’t worry about making the erasing flawless since CDL handles tight corners and smoothing during the cutter creation and editing process.
Once both designs felt right, I downloaded each page individually as its own image file so they could be uploaded separately into Cookie Design Lab.
Creating the STL files in Cookie Design Lab
Now it was time to switch over to Cookie Design Lab and upload the first design. Right away, I checked:
-
Point count – higher points = smoother outlines,
-
Any tight spots or awkward cutouts (there weren’t any major issues), and
-
Overall proportions for my ideal cookie size.
For this design, a width of about 3½ inches gave me a cookie just under 4 inches tall, which is a great size for a single cookie or could be used as a two cookie set. Then I toggled on some of my favorite CDL features:
-
Flip left/right, so the numbers landed would be on the correct sides,
-
Rounded handle for comfort (I sometimes also like to increase the handle size), and
-
Cutter name, placed automatically on the straightest edge so I can remember what this bear is holding next year.
From there, I saved the cutter to my library, downloaded the STL, and moved on to the second design.
The second (paid Canva) bear needed just a bit more cleanup. Inside Cookie Design Lab, I:
-
Increased the number of points to smooth the outline,
-
Selected and deleted multiple points at once to eliminate a tight spot where the lollipop stick had been, and
-
Double-checked sizing and proportions.
Because CDL already applied the blade, handle, and depth settings I use most often, this part was quick. I saved the cutter, downloaded the STL, and just like that, I had two finished Valentine’s cookie cutters!
Why This Workflow Works for Me
What I love about this process is how flexible it is:
-
You can use free or paid Canva designs,
-
You don’t need to trace, fill, or prep images before dropping them into Cookie Design Lab, and
-
You can make design decisions as a cookie decorator, not a graphic designer, and you don’t have to learn how to use advanced editing tools in Canva to make those edits.
Most importantly, Cookie Design Lab gives you control after the upload, so you can make your vision into a reality, even if you can’t draw.
Want to learn more about making cookie cutters with Canva and Cookie Design Lab? Check out all our cookie design blog posts https://www.cookiedesignlab.com/blog/category/cookie-designs/. And if you’d like to try Cookie Design Lab for free, email us at [email protected] and we’ll send you a code for a free one week subscription.